Monday, January 30, 2006

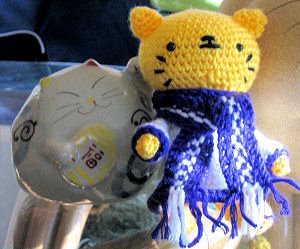
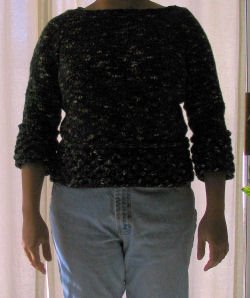
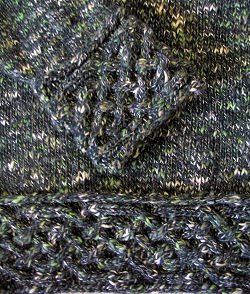
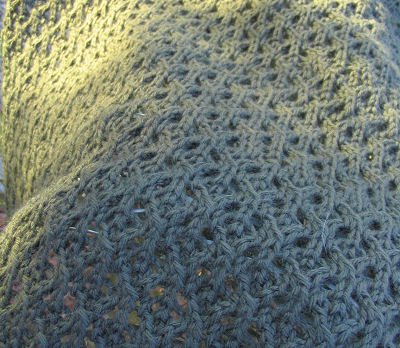
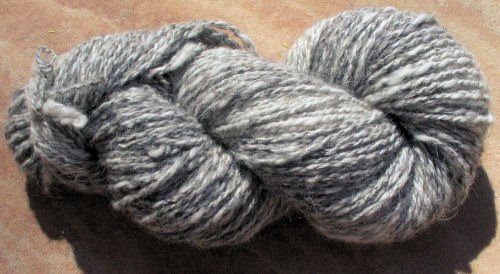
Introducing Ilion!

I'm working on growing my design skills - and here is the result!

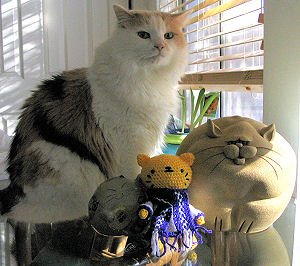
Inspired by my cat, Troy, and my attempts at stashbusting, the creation of Ilion proved to be a welcome diversion from normal day to day goings on.

The pattern is my own and is now up for purchase! Visit my store to find out more about materials required and to buy your pattern now!

Friday, January 27, 2006

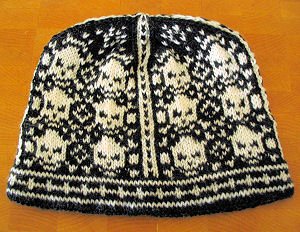
Yar, Matey!

oooh! look! Colorwork!

And Colorwork Guts!

I think I'm addicted to fair isle knitting. The ability to knit both continental and english style certainly sped thing along nicely.

Pattern: We Call them Pirates from hello yarn

Yarn: Dale of Norway Baby Ull*

Needles: US3 & US1

Comments: * before we get too far, yes, I realize that Baby Ull was *not* the yarn called for - and it is considerably smaller in gauge than Hauk, the recommended yarn. In any case, the hat came out lovely, if too small for an adult. Measured flat, it looks like it'll fit someone with a head 17-18 inches in circumference. As I mention above, it seems I adapted to stranded knitting just fine - I didn't seem to have any issues with the floats being drawn too tightly, and the fabric has wonderful stretch. If anything, the hat lining being tacked to the outer fabric might limit the stretch of the hat a little. I used a crochet provisional cast on (much better than the other provisional I've used in the past - the looping provisional, if you're curious), and knit the whole thing on a long circular needle - the same way I would do socks via the "magic loop" method (dpns and I do not get along - they are constantly insisting on sliding out of my knitting and leaving me with loops flapping in the wind - and all knitters know that uncontrolled flapping loops are not a good thing).

New Skills learned: fair isle knitting, crochet provisional cast on.

And now for the cool part: I am offering this hat up for a swap - since I have no children of my own, and it does not fit myself nor my husband (and I don't think my cats would like it if I tried to make *them* wear it), it can be pom-pom'd for extra cuteness, though I think that might clash with the Pirate motif ;) Contact me or leave me a comment if you're interested. (This is being x-posted so I'll be getting back to all interested parties if there are more than one. If you leave a comment be certain to provide your email address so I can contact you!)

Monday, January 16, 2006

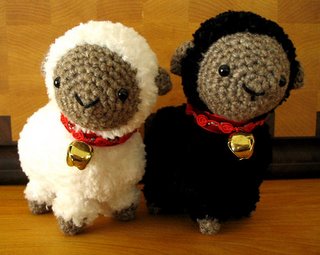
Two more for the Herd!

I couldn't help myself. I had lambs on the brain after all that work for Southwest Trading Co, and the response from you readers has been fantastic. I decided I had to quickly create another pattern for those of you who do not have access to merchants that might have the other pattern that was created expressly for SWTC!

Behold, my two lambkins - they are made of Southwest Trading Company yarns, mostly because I have a lot of yarn from them on hand. You can substitute like yarns, of course.

The pattern is my own and is now up for purchase! Visit my store to find out more about materials required and to buy your pattern now!

Saturday, January 14, 2006

Sproing!

Behold!

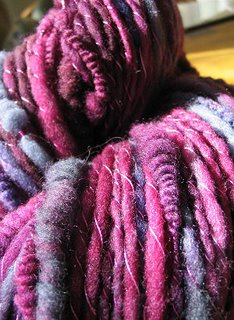
My first attempt at supercoils! Not too bad - though I have a little bit of learning to get through! Big thanks to Marie for providing tips and hints :) I aspire to be like Marie - she's got her handspun for sale at kpixie and the Point!

Anyhow, details:

Supercoiled Razzleberry Pie

Fiber: handpainted targhee wool (not by me) bound with variegated rayon thread - colors ranging from a rich deep raspberry to a gorgeous periwinkle.

55 g /1.9 oz

approx 118 meters / 129 yards

Comments: Soft and Sproingy, for future supercoiling, I think I need to actually put more twist into my singles (that and work on a more uniform twist still :D) - you may or may not be able to tell, but the yarn has very little twist in it now that it's been plied. Some coils are more tight than others. Definitely fun and interesting to look at - it did have some issues on the wheel, as some of the coils got stuck first in the orifice and then on the flyer hooks. Not availible for sale, as it lives with the Luscious Gracious Clan :) If interested, I have more fiber in this colorway ready for plying - leave me a comment!

Wednesday, January 11, 2006

And now for Something Sewn


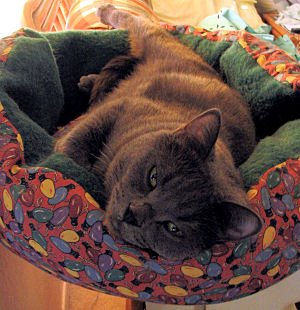
Not a recently finished object, but a finished object of a while back - I think I actually sewed this kitty bed up a year or two or maybe even three years ago! Luckily for me, my cat Troy has recently claimed it as his own, after ignoring it all this time! As a result, I've finally managed to get a good photo of it in use :)

The bed walls are just deep enough for him to curl up inside, and not be seen, if looking at it from the side. I simply made it up as I went along.

Materials: Festively decorated (oooh! Christmas lights!) Fabric - cotton print, I believe. Felt or fleece for the lining, and polyfil and batting for the filling.

Approximate method: In addition to sewing this, I sewed up a bunch of circular "tuffets" for the cats - the "tuffet" provides the base for this cat bed.

The circular "tuffet" simply consists of two circles of fabric, the exact same size, filled with a combination of batting and a bit of polyfil to add fluff and stitched in the center with an X to form a divet.

The walls of the cat bed are made of one long tube - it's long enough to just overlap itself when wrapped around the tuffet - I estimated the length required by measuring the circumference of the un-sewn tuffet circles. Once the tuffet part was complete, I sewed and stuffed the long tube for the walls. At that point, I had a round tuffet and one long stuffed tube - kind of like a cat sized body pillow. If you're inclined, pin the tube around the tuffet and sew in place - if you're like me, and dislike pins, grab the tube and the tuffet and whip stitch em together. The way I sewed mine together, it is kind of reversible, so that the felt part is on the outside - but I think the cat prefers it the way it is :)

Tuesday, January 10, 2006

A second career?

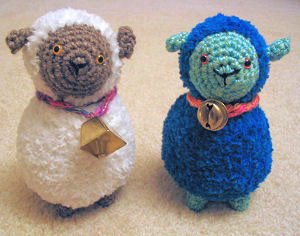
These guys will officially mark the start of my career as a pattern writer!

How exciting! They are the 2nd pattern I've been commissioned to create by Southwest Trading Company - the first was a Trellised Scarf made out of Karaoke. That particular pattern is available from yarn merchants that carry Southwest Trading Co yarns (just ask em to download it for you). These were inspired by my Amigurumi binge over the holidays - specifically by these fellows.

Pattern: Will be available through Southwest Trading Company and Merchants that carry their yarn

Yarns: The white sheep is made of Bamboo Feather and Karaoke, the Blue sheep is made of Twize and Bamboo Feather - incidentally, it's a vegan sheep - 100% bamboo yarn content!

While SWTC is very generous with their compensation, I'm going to try my hand at selling my patterns via my shop. Stay tuned!

Friday, January 06, 2006

Fanciful Fruity Yarn!


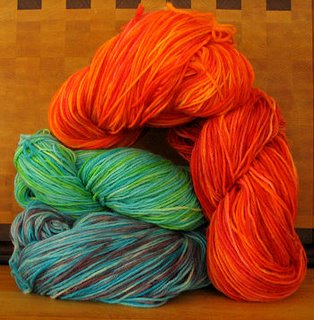
Mmmm! Yarn! In all its fruity glory! For details on the dye process, read here. It took several days to dry after dripping dry in the bathroom over the tub....the fruity smell is still there, though it is less noticeable (either that or I've simply become accustomed to it). Each hank is eight ounces of what used to be boring natural colored Lion Brand Fisherman's Wool. I like it much better this way in it's newly transformed fruity form.

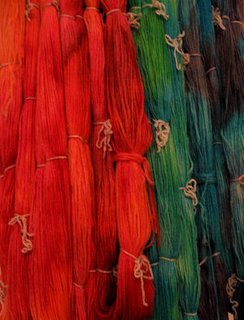
Here you can see it as a wall of yarn, fresh out of the dyepot and newly rinsed and pressed dry on a towel. Don't worry, I did spread it out after the photo was taken to try to encourage a more speedy drying. Even with the addition of food coloring and extra KoolAid packets, the yarn soaked up all the dye, as I noticed no dye bleed during the rinsing process, nor was my tub colored as the yarn drip dried. Unfortunately the Blues and Purples batch did not come out fully saturated and may be in need of an overdye.

While the Wall of Yarn was quite beautiful with its tie-dyed funky appearance, I greatly prefer how it looks re-skeined into smaller swift-friendly size - even though rewinding it took a long time (to dye the yarn, I wound it up on a huge niddy noddy). I'll probably leave them as they are until I'm ready to knit with them, at which point I'll bring out the swift and ballwinder.

I think I'm in love with dying, though next time, I'm going to use proper (non KoolAid) dyes, and I'll have to make a day of it and see if I can completely fill the pot!

Tuesday, January 03, 2006

Brightly Colored Birdies!

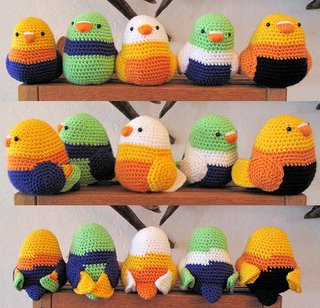
while it may look like there are 15 birdies here, I'm not quite *that* productive!

During the week between Christmas and New Years, I did also happen to make good progress on finishing off the remainder of my Lion Brand Microspun, though I still remain with a fair amount of purple and lime left over.

I had a fair amount of it on hand, left over from making several Pashas and Anouk - but not enough to know what to do with - enter Amigurumi Crochet! I'm just about ready to move off from this book - for all my enjoyment of the creative process, I guess I'm a linear thinker at heart - these birds are also from Amigugumi Collection Vol 1 - ISBN 4309265723.

Hook Size: US D/3 (3.25mm)

Comments: Easy and quick to make, without their wings, they look like little eggs - or perhaps not so little, as each stands just under 4 inches tall. I imagine if I downsized them and filled them with catnip, they'd make fabulous cat toys - especially because of how roly poly they are! I found the most difficult part was closing the bottom - instead picking back up and doing decreases as noted on the chart, I opted to draw the loose end of the yarn through the stitches and draw the bottom tightly closed - I simply wasn't liking how things were coming out tension-wise on the fabric once the bird was stuffed. Next most challenging was getting the feet sewn on - they're just little x's on the bird's bottom, consisting of 4 stitches, but like the 3-stitch faces on the sheep, they were hard to get evenly spaced. I'll definitely be holding this pattern in reserve for those random scraps of yarn that seem to accumulate as I finish projects!

Saturday, December 31, 2005

Anti Sheep?

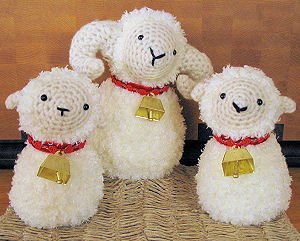
I remember reading a long time ago at the Yarn Harlot, that Anti Sheep is an anagram of Stephanie. Well it would be hard pressed to say that this or that Stephanie is Anti Sheep. I'm a big Wool Fan - as my Ridiculous Stash can attest.

So can these guys:


Who could possibly resist those guys?! I have to confess to not following my stash reduction plans - I was at JoAnns looking for something - I don't even remember what (I think it might have been 6mm eyes, but I'm not certain) - in any case, the yarn used for those guys was on sale. And I was between projects. That's my story and I'm sticking to it.

Details?

Of course, they are more Crochet Amigurumi - from Amigurumi Collection Vol 1 (no, I've not moved off of Volume 1 yet, but I do have plans to). ISBN 4309265723.

Yarn: JoAnn Exclusive - Sensations - Icee and Dolcetto in Off White and Cream, respectively. Incidentally, I've still got plenty of Dolcetto (the non fuzzy part) but I've used almost 2 skeins of Icee to make that small herd of Sheepies.

Hooks: That's right - hooks! Plural! The Dolcetto (for the bottom, ears/horns and face) was crochet using a 3.5mm (US E4) hook (for the small sheepies) and a 3.75mm (USF5) hook (for the big sheepie) - I prefer how it came out using the 3.5mm hook - that and the holes were small enough for me to put some polyfil beads in the bottom (for stabilization) without them leaking out. The Icee was hooked using a 6mm (US J10) hook.

Comments: They come together mighty fast and they are wonderfully adorable - I have to say crocheting the Icee (a feathery chenille-like yarn) was a royal pain (because I couldn't see what I was doing). I recommend putting polyfil or other weighted beads in the bottom of these guys, or sheep tipping may prove to be in your future. The horns were a little challenging on the big guy - I didn't have any white pipe cleaners, so I had to wrap polyfil around the black one I did have, and I had to use 2 since the pipe cleaner (craft variety) was not very rigid and wasn't cooperating in helping me shape the horns. Assembly was fairly easy, with the face being the most difficult - who would think getting three stitches centered and even (for the nose & mouth) would be so difficult?? The collar also took a little bit of time, as I could not find cord similar to that used in the book, and none of the yarns I had on hand looked good as a collar - I opted to go a little fancy and each is sporting a flower trimmed red velvet ribbon...and don't forget the bell :)

In case you're wondering - the big one took almost an entire skein of Icee. The pair of lambkins can be had from a single skein of Icee.

Thursday, December 29, 2005

Stashbusting Socks for Sandals or Clogs!


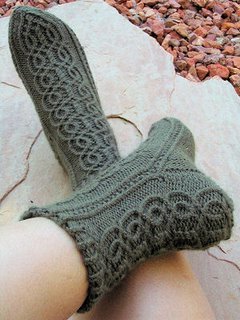
Remember Cozy? Well here's what's become of that last skein of Lion Brand Wool Ease!

I am happy to present Mizar! A fantastically quick knitting pair of socks, even with all those fancy cables (the trick is the worsted weight yarn!). Mizar is from the 2nd edition of Socks for Sandals and Clogs by Anna Zilboorg (and incidentally, they are my first cuff to toe pattern).

Yarn: Lion Brand Wool Ease in Loden

Needles: US5 (and no, as it turns out, I forewent the swatching and guess right on needle size. I probably could have knit them on US6s with no problems)

Comments: Well, I must admit I think I prefer knitting my socks toe up - mostly because I don't get that nervous feeling that I might run out of yarn before the sock is "done" - with toe up socks, I can just keep going and then knit the ribbed cuff when it looks like I'm about ready to run out of yarn. In this case, I had to guess how many pattern repeats to do before setting in on the heel flap (I guessed right here too) and though I could probably do with a little bit more length in the sock, they fit quite well as they are - and a good thing too, because I don't think I had enough yarn to do an additional 1/2 pattern repeat before starting on my toe decreases - as it was, I estimated approximately 20-25 feet of yarn remaining out of the skein once both socks were done. These socks were fun to knit, and they look gorgeous. The side pattern actually marches right on down and around the front of the toes - so I got to practice my non-standard Kitchner stitch again (I'm getting better). I admit to still having some small laddering issues, especially at the gusset - and I have problems keeping the ladders away if I switch needles and the next stitches don't match those preceding (for example, if I had a bunch of Purl stitches and then switched needles and went to the side pattern (a modified Rib) there was usually some laddering observed - I also have a little bit of laddering at the toe, where the decreases are right along side the side pattern). The good news is the ladders along the gusset were easy to fix, and the ones near the toes are not terribly noticeable. Ladders and all, I have to admit to a tremendous sense of accomplishment in finishing these socks - they're just gorgeous to look at and plenty comfy to wear!

Wednesday, December 28, 2005

I have a thing for cats

Can you tell?

This little girl comes from Amigurumi Collection Vol 1, one of my Japanese Craft Books.

ISBN: 4309265723
Yarn: Lion Brand Microspun in Buttercup, Lily and Purple.
Hook: USD (3.25mm)

I've found Crochet to be a welcome diversion from knitting, and the projects I've been tackling are small and seem to go fairly quickly. I'm getting better at assembly, so this little girl was finished faster than Citrine.

Unlike Citrine who likes to scamper about au naturale, this kitty sports a white frock, trimmed with purple, and has a matching slip stitched knit scarf.

Saturday, December 24, 2005

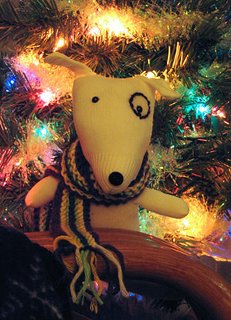
Gustaf Glovedog


introducing Gustaf

He lives with Schmeebot. He's a very debonair fellow, made of white gloves and sporting a microfibre knit scarf - apparently these garter stitch long-ways scarves are all the rage these days.

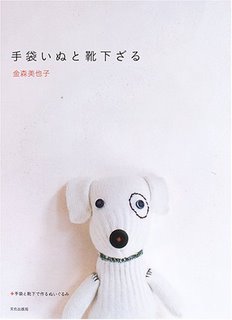
Gustaf is inspired by this book on the left (that is all about stuffed animals made from socks and gloves) - and is decidedly less Snoopy shaped (as the cover model is) and is more Spuds McKenzie-esque. I suppose that's my handling of stuffing for you - and short of tacking his ears down, they were never going to behave as the floppy ears on the book's cover model. Since I don't believe in unnecessary procedures, I opted to leave his ears as they were - perky and excitable looking.

ISBN: 4579110617

Gustaf is made from a pair of nylon gloves, and is handsewn (tho if I was ambitious to make a lot of Gustafs, I suppose I'd break down and do a bunch of seaming using a machine, leaving the finishing to be done by hand). Challenges included getting stuffing into his extremities without making them terribly lumpy (and he is a little lumpy - I suspect Mr. Cover Model is too - in any case this is why Gustaf is photographed from the waist up), getting his head stuffed and seamed (I think I'd baste the cut ends of the knit fabric the next time, as the fabric developed several runs that made seaming a little interesting) and getting his eyes set right. I opted to use stud eyes on Gustaf along with a spare button for his nose - because his eyes were such a challenge to set (and not re-doable once the backings were on), I think I'd go with buttons the next time. Definitely a fun little creation, and not terribly time consuming either!

Tuesday, December 06, 2005

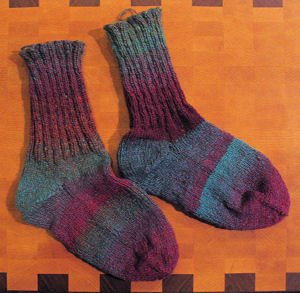
Silky Wool Socks

Mmmmm! I do love me some warm feet.

With Winter here and plenty of cold tile all over the house and me and the husband trying desperately not to be the first to cave and turn on the heat, warm socks are just the ticket. Hand knit socks are even better - mostly so I get that extra kick of "how cool is this, I made these" feelings when I put them on. On one rather cold occasion, my feet were festooned in hand knits - stuffed into my lovely socks which were then stuffed into my Fuzzy Feet slippers. Hooray for Wooly Goodness.

Anyhow, these here are my first socks ever. Not counting the Fuzzy Feet. Which were really just ginormous socks that were then felted down. Because I have a thing for being able to try the socks on as I go, I followed the toe up Pom Squad anklet pattern from Magknits.

Obviously, these are not anklet socks. I had some special yarn I was evaluating and I wanted to make the most of it - that and I figured why end at the ankle when I can have cuffs? (That and for some reason, Anklet socks never seem to stay up for me - maybe all the ones I've ever tried are just ill sized - they've all been commercially made, so who knows.)

Anyhow, I tried matching the colors as best as I could, and things started out very promising - until I came to a knot in one of the balls. Rather than try to find a matching spot of color in that same ball, I just spliced and carried on knitting.

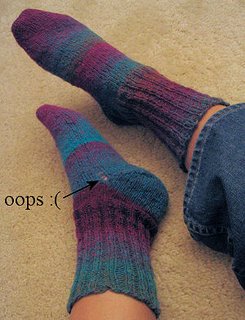
Overall, the socks came out quite well considering they are my first proper sized socks. Throwing caution to the wind, I did not gauge swatch, and as a result they are slightly loose, but that should be remedied quite nicely by throwing them in for a quick wash (hooray for feltable yarn) . Everything went quite well until the shortrow heel where I think I may have missed picking up a wrap or two, (some small holes present) and then I had a rather large hole appear when I rejoined the heel stitches to the instep. No matter how much tugging or attempts to pick up the slack by way of adding twisted stitches, I was simply unable to close the gaping hole noted by the "oops" in the photo above. I've heard a remedy is to use DPNs and to just keep moving over a stitch as you knit your rounds - unfortunately DPNs and I don't get along so well - they are always insisting on slithering out of my knitting, leaving me gaping in horror at the now free hanging loops. I've since switched to knitting either on 2 circulars or on one long circular. These socks were both knit at the same time on one long circular - they were started on 2 circs, but I kept picking up the wrong points and having to tink back to remedy the situation - finally in frustration, I switched to one circular just to see if it was workable and voilà - apparently I had just taught myself the magic loop method.

Friday, December 02, 2005

Scarves for the Holidays


I did very little knitting for this holiday season and was finished fairly early on - but it's because these scarves have to ship overseas along with a rather hefty care package.

Pattern: My own, same as the Trellised Scarf - I signed the pattern over to Southwest Trading Co, but I have not seen it posted on their site :(

Yarn: Berroco Uxbridge Tweed - unfortunately, I can't determine the colors since the yarn was discontinued and the color codes aren't on the color cards I have been able to locate.

Needles: US10

Wednesday, November 30, 2005

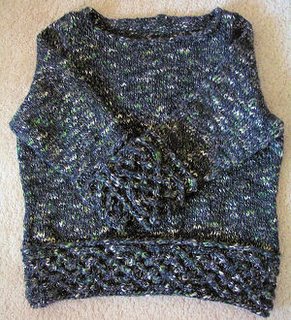
Finito!

tis done...well, 99.9% done anyway!

And it fits - sorry about the dreadfully dark photograph - I was having issues (to say the least) and was incredibly eager to post all about it as a Finished Object.

Anyhow, the details:

Pattern: Kepler by Emily over at Fathom Harvill

Yarn: Berroco Uxbridge Tweed in Southbury Green (discontinued - hooray, a stash buster!) - incidentally, it took about 10.5 balls of yarn (more than I had anticipated)

Size: Large

Needles: US9 with finishing touches using US7

Useful Skills/Techniques: Cabling without a cable needle (highly recommended), Set in Sleeves (proceed with caution), kitchner stitch (extra tricksy on cable bands) and applied i-cord (still needs work, for me anyway!)


Comments:
The pattern was well written, and easy to follow. Instead of knitting all the pieces separately and having a small mess of seams to finish at the end, I knit a good portion of the pieces in the round....I began with the cable bands, all at the same time, Kitchnered em together (and while it was a mite tricky, they came out fantastic and nearly invisible). I proceeded to pick up the stitches for both sleeves and knit em together in the round using one long circular needle (until the sleeve cap, of course). I Started with the sleeves and knit em together to reduce the probability of getting hung on sleeve island. I did the body in the round as well, splitting at the bottom of the armscye, and the knitting flew by.

Seaming the arms to the body (using lots and lots of pins, joining the pieces with a slip stitch crochet seam) and finishing with the applied i-cord (see below for closeup, was very slow going on my part) in one evening, the sweater is complete and wearable, though it might benefit from a gentle blocking - mostly because I don't think the shaping at the waist is very defined as it is - then again, that might be my own fault for knitting it in the round and not having side seams to help give the sweater some form on the sides.
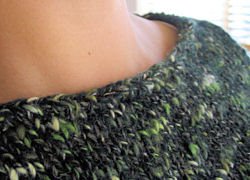
While I am fairly pleased, I would prefer to have had more defined shaping on the finished object (and it looked like it did while I was knitting it - but again, the sweater, as is, is currently unblocked) and I think I might prefer full length sleeves over the mid forearm capri-length ones - then again, that cable band is quite bulky and may well have driven me nuts if it was at my wrist. The Uxbridge Tweed appears to wear alright, though the cables aren't as clearly defined as I had hoped - I suspect this is due to the tweediness of the yarn.
Tuesday, November 01, 2005

Warm n Cozy!


That's right! After being on needles for over a year, I'm finally done! There she is, draped over a bush - looks like rolling green hills, no?

Pattern: Cozy from Knitty
Yarn: Lion Brand Wool Ease, in Loden, 4 skeins
Finished Dimensions: 60 inches x 25 inches (yes, the dimensions are different from the pattern)
Needle Size: US 9

Comments: yeah, I tweaked the pattern, wanting something wider than 19 inches, I cast on a bunch of extra stitches, unfortunately, I can't remember just how many extra I cast on and I don't have Cozy with me, so I can't count the bound off stitches...I also did 5 rows of garter stitch at the beginning and end rather than the 3 called for in the pattern....otherwise I followed the pattern faithfully ;)

From the beginning, Cozy and I seemed to be doomed to a love-hate relationship. She was my first lace pattern, and caused me no end of frustration, especially since that was before I learned about lifelines and placing strategic stitch markers to mark groupings of pattern repeats. I believe she was frogged something on the order of four or five times - thank goodness the Wool Ease stood up to the abuse. After languishing on the side as I moved onto other knitting, I decided I probably ought to put her out of her misery and either frog her and reclaim the yarn or finish her. As you can see, I decided to finish, though with the compromise of using only 4 skeins of yarn rather than the originally planned 5 skeins. I'm pleased with the result - she's long enough to wrap around me, and the lace pattern really wasn't as troublesome as I had remembered it being...I guess that's what happens when you work on other lace projects in the interim :)

For those of you who might be wondering, blocking a yarn such as Wool Ease is indeed possible - I went for a full wet block, drowning Cozy in the sink overnight, then staking her out with the use of my welding rods-turned blocking wires (1/16" aluminum tig rods). The use of wires helped keep the edges straight with a minimum number of pins. The rods I have, unfortunately, are prone to bending, and may be a little soft for this use, but they seemed to work fine and the price couldn't be beat. For good measure, I did do a quick pass over her with an iron on low heat while she was still damp - it didn't crush the knitting too badly, and it seemed to ensure that the blocked dimensions didn't spring back once unpinned.

While I am pleased at the result, I can't say I'll be knitting another cozy any time soon - I haven't the attention span for large rectangles....which doesn't bode well for the aran throw I was dreaming of :)

Sunday, October 30, 2005

Most Luscious Yarn.

4 oz/139 yards
113 g/127 meters

Certainly an experience trying my patience, I first unspun, then respun some yarn recently. The finished goods were slow in the making, but I think there was never a more luscious sock yarn ever made.

This granite tweedy yarn is 50/50 merino/angora, hand blended without any tools into this two ply fingering-sport weight yarn.
definitely high on the labor side - first unspinning piles of singles (I unspun a total of about 12 ounces of yarn) onto my hand spindles, then respinning and plying them on my wheel, I'm not certain if my fingers will forgive me anytime soon - it seems there was a fair amount of stress on my index finger and thumb while drafting because I was unable to completely remove the twist from the singles the first time round. In any case, the result is pure softness and luxury! If no one buys this yarn, I'll be happy to turn it into socks for myself!

Thursday, October 20, 2005

Like Pixie Stix, but Better!

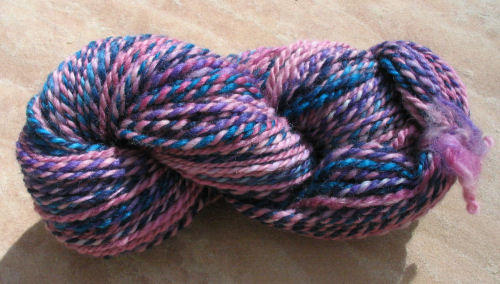
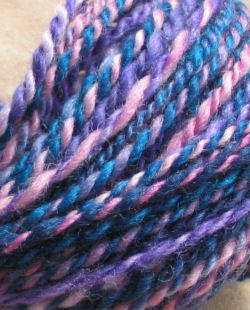
Better, because it's Yarn! Previewed here, but to be offered for sale on Etsy if they don't move before then...three skeins of luscious Blue Faced Leicester Wool hand spun into approximately worsted weight 2-ply yarn in hues of pinks, blues and purples.

3.3 oz/116 yards
95 g/106 meters
$40

I should probably tell you that if you click on any of the photos, you can see a much larger image of the photo in question.
Each skein is continuous, and has no breaks at all, so rest assured, there are no lurking hidden knots inside.

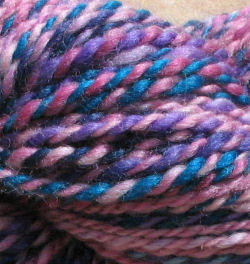
The image to the left is a closeup of a section of the above skein...isn't it lovely? Don't you just want to reach out and pet it?

This skein is the largest of the three, and also seems to have the most pinks throughout.

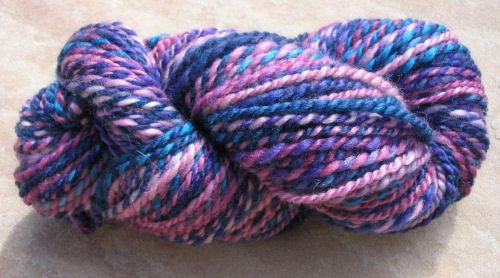
3.2 oz/97 yards
90 g/88 meters
$30

This second skein seemed to have a touch less pink in it, and a bit more blue and purple - or it could just seem that way with the plying!

All of these skeins came from the same hand dyed roving - so the colors in each of the skeins matches those in the other skeins. Each skein varies from the next a little because of the way I split the fiber for spinning.

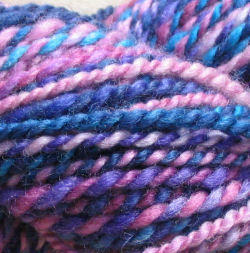
I should mention that the yarn is incredibly soft and has a very subtle halo to it, probably best visible (but still not terribly obvious) in the pre-plying photos seen here.


3.2 oz/103 yards
90 g/94 meters
$35

It seemed to me that this skein is a touch more blue than the previous one - but it could just be an aspect of looking at yarn for too long :)

You're probably wondering why I'm calling these the Pixie Stick lot - it's because that's all I could think of as I spun the yarn up and plied it together - for some reason, the colors remind me of pixie sticks and sweet tarts.

In any case, if you're interested in any or all of these, drop me a note by email or leave me a comment. Once they've been here for preview for a while, I'll send em over to my Etsy Shop.

Tuesday, October 18, 2005

A Little Tacky

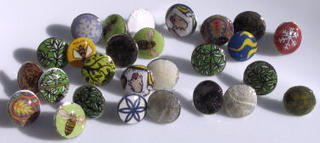
wee little decorated thumbtacks

While we were busy cleaning up the house, we stumbled across a box full of office supplies from when we were both in school. Inside, I found a box of thumbtacks. Since my marble magnets aren't selling, and glue and a hole punch languishing by, I thought I'd see if I could make the thumbtacks look more unique and colorful.

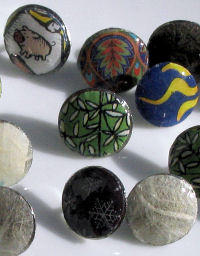
Leafing through some magazines and catalogues yielded some cute images. I also gave a try to using some handmade papers I have sitting in my paper stash. You can see some of the tacks up close and personal over yonder to the left.

I think I've succeeded, don't you? They do take a bit of work, and some fussing - I never realized how poor the quality control is in thumbtacks. Some had pins that weren't perpendicular to the back, others had chunks missing off the flat bit, as if some crazy tack eating monster had to have a nibble. The variation in the diameter of the thumbtacks was also surprising. I fear I'm showing my engineering nerdiness so I'll hush up now.

Colorful thumbtacks in hand, I'm ready to post all my crazy ideas on a board for easy perusal... my problem now is that I don't have a bulletin board. *sigh*

Friday, September 09, 2005

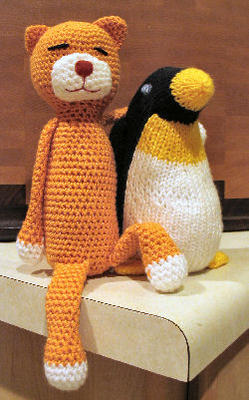
Introducing Citrine!

(and reintroducing Pasha!)

You all already know Pasha.

I'd like to introduce to y'all Ms. Citrine - named after the orangy colored gemstone.

Pattern: From the Japanese book with ISBN 4391130122
Yarn: Lion Brand Microspun in Mango
Hook: USF5 (3.75mm)

That's right! Hook, not needle! I'm a Hooker now! ;) Continuing to branch out in my fiberly arts, I've now picked up crocheting in addition to knitting and spinning.

Comments: After learning the basics from a friend, I was cranking out kitty bits in a reasonably quick pace. A little bit of creativity was used in changing colors (being self taught and all, and not finding any direction in either of the two crochet books I have). Assembly of the kitty from the neck on down was wonderfully easy. I can't say the same for the head. I think I spent as much or more time working on Citrine's head as I did assembling the rest of her!

The first delay was in creating her muzzle - attaching her nose was no problem, but getting her mouth done took a few tries. Once complete, attaching her muzzle posed no difficulty. The next trial in frustration were her ears - I think I attached each ear at least twice. And the final bit of frustration was sewing on her eyes. I first tried french knots, so it would look like her eyes were open, after attempting several tries and not being happy with any of the results, I fell back to the line-shaped eyes as illustrated in the book. I never knew sewing two lines would be so difficult! Ah well, she's done now, and looking quite good, if I do say so myself :)