Monday, December 31, 2007

Hat with Holes...


Pattern: Urban Homesteader by Christy
Needles: US 6 & US7
Yarn: SWTC Karaoke - Held Double stranded for most of the knitting

Comments: Sorry about the "flashy" photo - I was needing to do the self portrait thing and I wasn't having any luck outside. This hat was a really fast knit, and it worked well to help bust some of my stash :) While it does make my head look a little jelly-fish like - especially in that center photo - I love how deep the hat is. It means my ears definitely stay completely covered when worn (even when I don't wear it with my hair sticking out one of the flaps). Right now, I'll probably be using it mostly in Pony tail mode, only because my hair is much longer than I realized it was :) Definitely recommended. Don't skip out on whipstitching the edging on those flaps, btw - otherwise you may notice your flaps are really curly!

Friday, December 28, 2007

Cabled Goodness (Central Park Hoodie)


Pattern: the Central Park Hoodie, originally from Knitscene now available from Interweave's Knitting Daily shop.
Yarn: Paton's Classic Merino Wool in Burgundy - less than 6 balls used.
Size: 44 - though my gauge was slightly smaller, so it's somewhere between a 40 & 44.
Needles: US 5 & 7
Modifications? Of course!

Commentary:
I do believe this is one of the fastest sweaters I've ever knit. I don't recall ever being quite so eager to cast on for any given project - I blame this one on the cold weather snap that has me bundling up in all my handknits - definitely a rare treat down here in the desert! Anyhow, I purchased the pattern and went hunting for yarn on December 11th, knit a hasty swatch and cast on that evening. That would be where modification # 1 came in - I knit the body in one piece - after consulting the pattern, I found it odd that the fronts and the back didn't end with the same type of stitching allowing for nice seam in the ribbing, so I simply cast on the total number of stitches (I didn't subtract 4 stitches for the seams) and knit happily away on my 2x2 ribbing. After 4 inches of ribbing, that was where I discovered that there must have been an error in the pattern - The right sides of the fronts should have started out with opposite stitches - the Right Front should have started with P2 instead of K2, and vice versa for the Left Front - voila, the missing stitches and the non-smooth ribbing was now accounted for. Undeterred, I decided I could make things work out and didn't rip back the 4 inches of ribbing on small(er) needles.

In order to make things all look good, I had to decide if I was going to have the cables appear to seamlessly emerge from the ribbing on the fronts or the backs - or see if I could fudge things around to make it look excellent on all counts. I wound up settling for having the outer cables on the back not flow perfectly up and out of the ribbing, though I was able to salvage the center cables by turning them into 4x4 cables rather than 3x3...Of course, I came to this realization after I had knit several inches of the body - fear not, I didn't rip it all back to resolve this - instead I opted to drop back all the cable stitches for that center cable sequence and pick them up and reknit em from the ribbing upwards :) Sadly, I didn't take photos - it was an impressive sight. My husband thought I was nuts. Once I had the cables changed to my liking, everything from then on flowed quite nicely. I had been tempted to graft the shoulders together, though I was not satisfied with my initial (hasty) results, and wound up doing the 3-needle bindoff instead.

For the hood, I decided I wasn't going to be happy with the cable ending abruptly at the top bottom of the neck, nor was I going to be satisfied with it ending at the top of the hood to disappear into a seam - I figure a hood is just like a really big sock heel, so I went ahead and modified the pattern, changing the decreases and carrying the cable up and over the top as if it were a heel flap - I also modified the ending sequence of the cable pattern to have them merge together into a single 2x2 twisting cable at the front of the hood. While I am very happy with the results, I should probably confess to having ripped back the hood at least once as the first attempt left me with a gigantic hood that would have looked more at home on a flowing cape than on a fitted cardigan (it was way too voluminous). With a lot more patience, and my handy Vogue Knitting Ultimate Knitting Book opened to the 1x1 rib grafting instructions, I wound up grafting the edging cables together at the top center of the hood quite nicely if I do say so myself :)

Sleeve Island was conquered by knitting both sleeves together, at the same time, circularly - the same way I knit socks ;) Finally, I set in the sleeves, and picked up all the stitches for the 2x2 ribbed edging (yes, another modification, I went to all that trouble to make the hood look seamless, I couldn't very well have allowed for a seam front and center now could I?) and knit like a fiend. I finished all the knitting on Christmas Eve Eve, tried various methods of closures from simply holding the cardi closed by overlapping the front edgings and pinning them with a DPN, to installing buttons on the insides to allow for clean lines of ribbing to be featured - I wasn't happy with either option, so I gathered up some yarn scraps and braved Jo-Ann Fabrics on Christmas Eve to find a zipper - lucky me, they had a perfect match, in a perfect length...and it was 50% off :D...now all I had to do was get the darned thing installed...

Those of you who are aware of my previous cardi adventures know that I don't trust my handknits to myself and my sewing machine - I typically hire out to have my zips installed. Unfortunately, there was no way the zip was going to get installed in time for Christmas if I went that route....so the rest of Christmas Eve was spent referring to various sources on how to hand-install a zipper.

I patiently pinned the zip in (as recommended by the Domiknitrix book) and carefully tried it on to make sure there was no bunching or rippling. I then basted the front of the cardi shut to make sure all the ribbing was happily aligned (per the fantastic instructions by Bonne Marie at Chic Knits and adjusted my initial pin-job accordingly. I then threaded my needle with matching thread and whip stitched that baby in place as directed in that Vogue Ultimate Knitting book. Once the zip was secured, I turned back around and backstitched my way right back down the zipper to make sure it was in for the duration. I should note for those wondering that there were no modifications required to get the zipper to go in nicely, though you will notice a slight mashing of the yarn about a stitch or two in from the bound off edge - this is where the backstitches march on the fabric. You might want to go with a different edging, rather than the K2P2 rib, but as I didn't do so, I can't comment how well a different edging might look - I'd think a plain stockinette hemmed band would work well, though it would mean additional seaming/finishing - but I suspect it would be easier to install the zip on something other than the 2x2 rib - especially if you're slightly obsessive like I am and want all the knit parts to line up nicely with all the purl bits :)

I daresay I did a pretty good job of it, don't you?

And here we are, outside, where the light gives a much better represntation of the actual color of the cardi. With nice long sleeves, and a slightly longer body than my Ribby Cardi, I think this will become a favorite this season!

Of course, I can't leave you without a view of all the cabled goodness :D Definitely a treat to knit, and fast too - and yes, I was done before Christmas :D

Wednesday, December 19, 2007

Guinevere - the Secret of the Stole


Pattern: Secret of the Stole I by Nautical Knitter
Yarn: Spritely Goods Fey, in CoffeePot Rock Colorway. Approx 2.5 skeins used (10 oz)
Needles: US6
Miscellanea: Iridescent and Luster glass beads in complementary colors. Only one small bit of the "middle" section was actually knit due to concerns over the finished length of the stole.

Finished Dimensions: 100 inches by 26 inches - yow!

Comments: This stole was (I think) my first ever "mystery" type project - and the knitting was enjoyable. The finished stole is quite lovely, though had I estimated my yarn usage better I would have blended in the 3rd skein of yarn in over the entire length of the stole - it is the same colorway, and dyed the same day too - this is the nature of handdyes though. Unfortunately, no matter what I do, I can't seem to get a good shot of the stole - it's very long, and I seem to be lacking in drape-worthy surfaces. Every time I laid it out on the floor for photographing, I wound up chasing the cats away. If I had it to do all over again, I probably would have opted to forego any knitting in the middle section at all to shorten it up another several inches and I might have gone with one of my more solid colored yarns. While the coffeepot rock colors are fairly muted and don't obscure the pattern too much, a solid (or only slightly variegated) yarn would have displayed the motifs even better.

If you are interested in knitting the stole, I do recommend joining the yahoo group to read up on the inspiration and background for this stole.

A much more gorgeous photo by the Nautical Knitter:

Monday, October 15, 2007

Wing of the Moth

Pattern: Wing of the Moth" by Anne Hanson of Knitspot
Yarn: Handspun Singles from Spritely Goods handblended batts in Arizona Sycamore colorway, combined with additional fiber that was blended by hand rather than by the carder.
Needles: US 6

the moth, pre blocking

Comments: Have I said recently how much I love lace? It's challenging to knit, and it has different "faces" to it at different stages of the process. Witness above and below - the moth, prior to blocking - it has such texture to it in its unblocked state!

another preblocking photo - of the moth preblocking

I love these bumps - they were formed on the backside of the shawl, in the fircone lace section - witness the fuzzy halo from the angora :)

The patten itself is well written, though due to my own peculiarities with how I use markers I had a little bit of a challenge figuring out just what I was supposed to be doing during the transition rows, but if you follow the instructions, you should be fine.

Blocking this baby wasn't too bad, and it didn't seem to take any longer than my other shawls - I ran blocking wires across the top edge, stretched her tight evenly across the top (7-foot 8-inch wingspan on this one - I'm rather aggressive with my blocking though), then pulled the midline tight and pinned it in place (46 inches tall if I remember the measurement correctly). From there, it was a question of pinning out the coronas - I did this the same way I did the points on my other shawls - I pinned the "center" point of the "center" corona out on both left and right sides, then I did the next midpoints between those coronas and the bottom point and top points, and continued in this manner until each midpoint of each corona was pinned out - then I went back through and pinned out each of the loops in the corona to get that nice scallopy edge. I will admit to getting a bit impatient at that point, and pinning away at will from left to right along each corona, which has resulted in some slightly lopsided scallops, but I figure it will do for now ;) I'll have to reblock her sometime in the future anyhow :D


Those that followed along on my regular blog might recall that the yarn spun for this project was prepared in 2 different methods. The main fircone portion (the portion in the lower right in the above photo) was spun from blended batts. The yarn used in the outer portion of the shawl was prepared by actually blending fibers at the wheel - resulting in considerably more striping. The fibers used in the preparation were the same as those used in the batts, and also in the same ratios - they just spin up differently depending on how thoroughly blended they are.

The Moth was a pleasure to knit, I just regret that I can't seem to capture the slight sparkle that is present in the yarn - The colors remind me of a Sphinx Moth, though up close, there is more earthy green visible. I'm looking forward to the weather cooling down so I can actually wear the Moth rather than simply gaze at it!

Tuesday, October 02, 2007

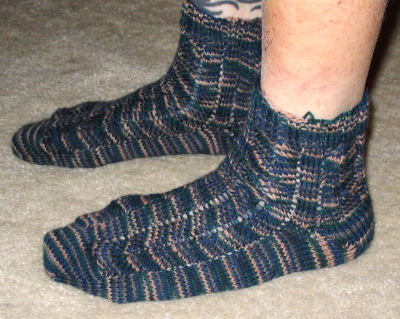
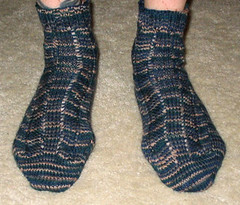
Broadly Rippling

broadrippleside


My husband is winning out on the handknits...first he (finally) got Avast, and I just recently finished him a pair of socks! And before anyone comments on the length of the socks, he was consulted and that was the length he wants - and all the easier on me as I didn't have to knit on and on and on for the leg :P And yes, you might be noticing a loose tail hastily tucked in - all my hand knit socks have that characteristic. Something about finishing and weaving in ends - I believe almost all of my handknit socks have the little tail hanging loose at the cuff.

broadripple front
Pattern: Broadripple from Knitty
Yarn: Sock Landscapes in Cape Cod from Knit Picks by way of Janet (thanks Janet!)
Needles: US 3

Modifications: Toe up with short row heel :)

Comments: Easy pattern to knit and plenty manly in the right colors. The pattern stitch, once established, allowed me to happily knit away without having to reference the pattern at all. I'm getting better at short row heels, though I still had a little bit of a hole when I resumed knitting in the round. This even after I picked up an extra stitch in an attempt to close the hole. *sigh* perhaps that's another characteristic of a handknit sock (for me anyhow :P)

Monday, September 24, 2007

Avast, at last!


Pattern: Avast from Knitty
Yarn: SWTC Karaoke in Black Sheep Colorway (50-50 wool & soysilk)
Needles: US 5 and US7 - managed to hit gauge perfectly :D
Size: Medium
Modifications: Slightly longer torso (I think) longer sleeves, and I opted to knit the sleeves in the round and kitchner the underarm seam rather than seam it. Essentially the sweater is seamless :)

Comments: I honestly don't recall if I washed the swatch before carrying on with this sweater - though it is fair to say that even if I had, I'm not sure I would have captured the increase in length of the finished object or not - after all, a full size sweater has quite a bit more material and weight to it than a tiny little 4x4 swatch. That said, the sweater fits great through the torso, though both the arms and the body are a touch on the long side...some of this may also be simply due to the ease that is allowed - when I took the measurements to knit to, I took exact measurements from the underarm to determine sleeve length and body length on the sweater - it should be obvious that the sweater does have some ease to it, and does not fit tightly into the underarm of the wearer (thank goodness) :)

The zipper (hard to see) actually goes all the way from the waist to the top of the collar - so in cooler weather, it can be zipped completely to form a mock turtleneck. I opted to take the sweater in to my local tailor to have the zipper installed - at 31.5-inches, I wasn't about to hand sew it in, and I certainly wasn't about to trust it to my sewing machine.

Classic in design, and easy to knit (oy, the miles of stockinette!) - I wound up knitting from a couple balls of yarn at a time in an attempt to reduce the broad striping that Karaoke tends to do. This is actually the first sweater I've knit for my Dear Husband, and he seems to like it well enough - we'll see once the weather cools down since he wasn't thrilled to be modeling it with the temps still over 100F down here!

Monday, September 17, 2007

Wabenschal Scarf


Pattern: Wabenschal
Needles: US8
Yarn: Spritely Goods Sylph Superwash Merino Yarn in Limited Edition Spring Chaparral colorway (less than one skein)
Finished Dimensions: (approximate) 10 inches by 7 feet

Comments: Quick to knit, this lace scarf is knit on the bias and is shaped like a long thin parallelogram. I found the pattern simple and easy to follow, with clear charts. For those just learning how to read charts, this may be an easy pattern to learn on - unfortunately for those that don't read charts, the instructions are not knit line by line. I always find it a bit of a challenge to figure out when a rectangular lace piece is "long enough" because they do stretch quite a bit in the blocking - in this case, I blocked this piece twice - the first time, it was more narrow and over 8 feet in length! Since it is intended to be used as a scarf (though I'm sure it can also be used as a table runner), I figured I should reblock it to get it down to a more manageable length. By stretching it a bit wider than it was originally when first blocked, I managed to "shrink" it by about a foot.

Monday, August 27, 2007

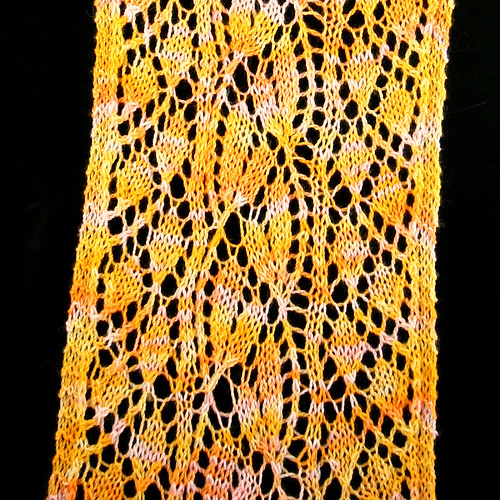
Dayflowers and Leaves


Yarn: Spritely Goods Sylph in Globe Mallow, less than 1 skein (approximately 3 oz)
Needles: US8 / 5.0 mm
Pattern: Now available at Spritely Goods
Finished Size: approximately 9 inches wide by 7 feet long.

Comments: I really enjoyed working this scarf up, and if I knit another one, I will probably swap the left and right leaf panels. If I'm really brave, I'll figure out how to eliminate the "border" stitches between the two motifs...though after examining the finished project, I suspect those border stitches between the motifs help keep the scarf nice and even along the edges.

The big challenge with this scarf was charting it out...the full repeat for the entire width of the scarf is 80 rows....because of the differing repeat length of the individual components. I suppose I could have gone and knit it from 2 different charts, however I'm sure I would have mucked things up had I done so (keeping track of individual rows was enough of a challenge ;) )

As for the yarn, it worked out very nicely. I wasn't sure how the variegation would play out on this project - it turned out that it didn't hide or diminish the lace pattern at all :)

I believe this is my first project that I've actually also kept tabs on over in Ravelry - for those that are members, the project is listed here.

Thursday, June 28, 2007

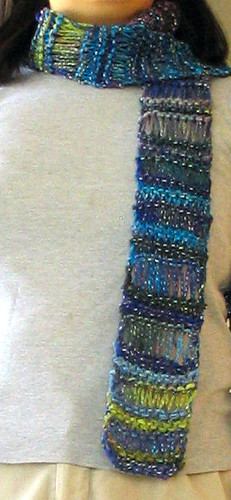
Dropped Stitches in Lotus

Dropped Loops in Lotus
Simple was the way to go.

After numerous attempts at other stitch patterns, I finally gave up and settled for a simple drop stitch scarf to show off the Noro Lotus.

Because I was knitting with 2 skeins of yarn, one with a rather abrupt color change (there was a knot about a third of the way into the skein), I decided to alternate knitting every two rows from each skein, carrying the wan on up as I knit along - The result was slightly broken color transitions, but beautiful none the less.

Yarn: Noro Lotus, 2 skeins
Needles: US13
Pattern: None, but I'll write it out below if anyone else wants to knit one :D

Finished Size: 7" x approximately 4-inches.

Pattern:
Loosely cast-on 10 stitches with one skein of yarn.

Knit 1 row

Attach the 2nd skein of yarn, and knit 2 rows.

(Row 1) Switch yarn, picking up the new yarn towards the back of your work. K1, *YO, K1*.
(Row 2) Knit all "main" stitches, dropping all yarn overs.

(Rows 3 & 4) Switch yarn, Knit 2 rows.
(Rows 5 & 6) Switch yarn, Knit 2 rows.

(Row 7) Switch yarn, K1, *YO twice, K1*
(Row 8) Knit all "main" stitches, dropping all yarn overs.

(Rows 9 & 10) Switch yarn, Knit 2 rows.
(Rows 11& 12) Switch yarn, Knit 2 rows.

Repeat these 12 rows for as long as you want or until you are close to running out of yarn.

If you have a thing for symmetry, you'll want to end your scarf with the following sequence:
(Row 1) Switch yarn, picking up the new yarn towards the back of your work. K1, *YO, K1*.
(Row 2) Knit all "main" stitches, dropping all yarn overs.

(Rows 3 & 4) Switch yarn, Knit 2 rows.
(Row 5) Switch yarn, Knit 1 row
Bind off all stitches loosely.

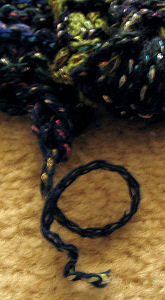
Noro Tail

I must have lucked out because after I bound off, this was all the yarn I had left! It came out perfectly though because I was wanting to make the most out of those two skeins, and I don't think I could have asked for a closer margin.

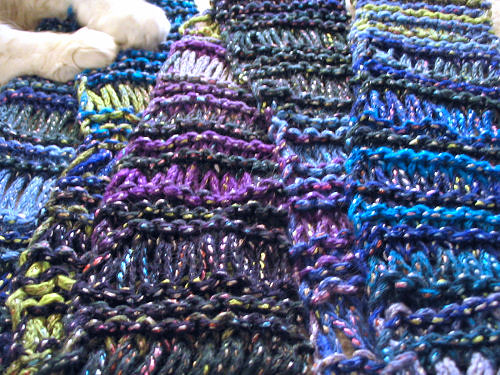
Looking for a close-up of the scarf?
I'm happy to oblige :D

Cat paws included for scale ;) (actually, my cat refused to let me get a photo of the scarf on the floor without being in the photo - she's like that with knits...if they are on the couch, they're fine - if they are on the floor, they are apparently hers.)

Wednesday, May 30, 2007

Blue Bamboo Baudelaires

Lace and cables and socks. I never thought I'd be one for "girly" socks, but I do seem to be hooked when it comes to handknit ones :)

Pattern: Baudelaire from Knitty
Yarn: Regia Bamboo Color - 1063
Amount: Quite possibly only one ball, I was working with what I had left over from my Swallowtail
Needles: US1

Comments: First, lets go for a closeup of the lace and cables, shall we?

*sigh* I am really mostly happy with how these turned out - they were wonderfully satisfying to knit - the lace pattern was an easy one (for me anyhow) to remember. Pattern modifications? Why yes, always, thank you very much - what fun is it if I'm going to knit if I can't add a little something of my own?

As far as modifications go, this one was fairly minor - I made the right and left socks mirror images of each other - meaning the cables are mirror each other when the socks are worn. I love them this way - I think if I had them marching in the same direction on both socks, I'd feel lopsided...but that's just me. The other change I made was to do the heel with a slip stitch for the flap. I had originally cast on for these socks in a size M and turned the heel complete with stockinette heel flaps, but found that my gauge must have been off as the socks were decidedly loose - after ripping them back, these finished ones are size S and they fit perfectly.

I was really pleased with how my heel came out - no holes, not even when I rejoined the instep :) I must be getting the hang of this sock knitting business. My only quibble with these socks is that I have a hard time getting them over my heels. This is apparently a fairly standard quibble with toe up socks, though I did not notice it with any of my previous pairs of socks (all knit toe up). It may just be this particular lace pattern combined with a certain eagerness to be done that may have had me starting the gusset a few rows earlier than may have been prudent...


...regardless, I think they are quite lovely, and I'm going to enjoy wearing them.

Monday, April 23, 2007

More Singles


A full day of spinning results in three full bobbins...11 ounces and almost 800 yards worth of lovely yarn with a slight sheen.

Fiber Content: 50-50 Fine Wool & Soysilk - I purchased the fiber dyed, but then decided to add some additional color to it by overdying prior to spinning. I'm calling it Tropical Sea because it reminds me of the bright yet blue-overtoned colors of a tropical reef.


Specific yardage on each skein will soon be available as I'm planning on listing these at the shop. I'm hoping to have them listed by the beginning of May.

**Whoops. While I did indeed have them listed at the beginning of May, I apparently forgot to activate these beauties in the shop. They are there and active now :) Note: I'm linking to the DK weight skeins, though there is also 1 skein in sport weight also.

Saturday, April 07, 2007

Newspaper

Spun especially for a special person's birthday...these colors are her favorites :)
I named it after the children's riddle: what's black and white and "red" all over?

It's a bunch of mixed wools, spun up single ply though it has fantastic barber poling and almost looks plied because I held the colors of roving parallel to one another. Unfortunately, I forgot to grab the yardage and weight - from memory I think it came out to be a light-worsted in thickness and there was plenty of it :D

I have to admit this is one of the few truely finished objects for the year so far, though it certainly isn't for lack of trying!